Gladiolus Flower Bulbs Information
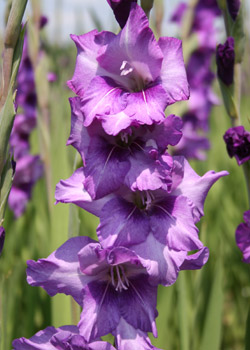
Reminiscent of a more refined, Victorian age, the blooms of the gladiolus have been adorning summer gardens and fresh floral arrangements for centuries. The long stems of multiple ruffled and often vibrantly-colored flowers provide beautiful accents in the small garden and large masses of color in the larger landscape. Depending on the variety, these stems can reach anywhere from 20-60" tall. Gladiolus can be found in just about any color of the rainbow, including some unique color combinations in some relatively new variety. While most of the them are frost-tender, there are a few hardy Gladiolus which are somewhat miniature in size and do very well in the more northern climates.
Plant Information
- Planting Time: Spring
- Bloom Time: Mid Summer
- Hardiness Zone: 8-10
- Suitable Zone: 4-11
- Light Needs: Full Sun
Planting Gladiolus
- Gladiolus corms are typically planted during the spring season after the threat of frost has passed.
- Choose a planting location that has well-drained soil and receives as much sunlight as possible. The more sun a corm receives the more blooms it will produce.
- Space the corms approximately 6-8" apart, depending upon how full you would like the garden to look.
- Plant the corms pointed-side up approximately 4-6" below the soil surface. It is sometimes easier to determine which side of the bulb is not pointed, rather than which side is pointed. Therefore, plant the least pointed side downward.
- Gladiolus typically bloom for a period of 2-3 weeks approximately 80 days after planting. Therefore, many gardeners stagger the planting of their gladiolus by two weeks to extend the bloom time. For instance, begin planting the corms in mid-May and then again every two weeks through mid-June. This will result in gladiolus blooms from July through August rather than just for a period of two weeks.
- Thoroughly soak the area with water once the corms have been planted. Continue to water throughout the growing season, being careful not to provide too much moisture. Fertilize plants once per month if desired with a well-balanced water soluble fertilizer.
- Remove finished blooms to maintain a clean appearance and encourage reblooming. To create fuller, more bushy plants, pinch back the center stem just above the third set of leaves. This shoot can then be rooted if desired. For larger blooms, pinch back all side buds only allowing the center one to remain.
- Allow plants to continue growing until just before the first frost. This enables them to produce food for next year's growth. If planted in containers, force the bulbs into dormancy by gradually withholding water at this point.
- Once the foliage is slightly damaged by frost, gently dig them up. Cut the flower stalk just about the corm and dust off any excess soil. Cure the corms for about 3 weeks in a warm, dry, and airy place.
- Place the dried corms in a paper bag.
- Store the tubers for winter in a dry place which remains consisting below 55 degrees but does not freeze, such as a cellar, basement, or garage. Make sure they receive adequate air circulation and keep the area dark if at all possible.
- Replant in spring according to the above instructions.