Calla Lilies Information
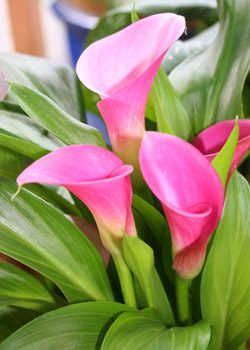
Exquisite in every way, calla lilies have stood the test of time both in the garden and floral industry. Often seen in wedding bouquets and other fresh floral arrangements, the sturdy stems, vibrant blooms, and elegant nature of the calla lilies make these plants truly timeless. Calla lilies typically range in height from 10-16" and come in a variety of eye-catching colors, including yellows, oranges, pinks, deep purples, reds, and of course, the ever-popular creamy white.
Calla lilies do well when used as garden borders, planted among other lower-growing bulbs and perennials, and also in containers. Again, they are perfect for cutting and the multiple blooms on each plant allow for them to be picked without leaving a whole in the landscape. They are hardy than most other spring-planted bulbs, often surviving the winter even in Zones 6 and 7 when mulched in the fall.
Plant Information
- Planting Time: Spring
- Bloom Time: Mid Summer
- Hardiness Zone: 7-10
- Suitable Zone: 4-10
- Light Needs: Partial - Full Sun
Planting Calla Lilies
- Calla lily rhizomes are typically planted during the spring season.
- Choose a planting location that had well-drained soil and receives full to partial sun for best results. Calla lilies thrive in sunny areas but do not do well in extreme heat.
- Space rhizomes approximately 12-15" apart as they will spread and get quite full even in just one growing season.
- Examine the rhizomes for points of growth. More often than not, these rhizomes will have multiple "points" on one side. This is where the plant will sprout. If able to determine the location of these "points," plant the rhizome with this side facing upwards approximately 2-3" below the soil surface.
- Thoroughly soak the area with water once the rhizomes have been planted. Continue to water throughout the growing season, being careful not to provide too much moisture. Fertilize plants once per month if desired with a well-balanced water soluble fertilizer while actively growing.
- Remove finished blooms to maintain a clean appearance and encourage reblooming.
- Allow plants to continue growing up until just before or just after the first frost. This enables them to produce food for next year's growth. If planted in containers, force the bulbs into dormancy by gradually withholding water as the weather turns colder.
- Gently dig rhizomes out of the ground and allow them to dry out on a cool, dry surface, such as a screen, paper bag, or garage/shed floor. When the stems break free from the bulb, dust off any extra soil and allow tubers to cure in the sun for 4-7 days.
- Store the rhizomes for winter in open flats containing dry peat moss or in dry paper bags. Place flats or bags in a dry place which remains consisting below 55 degrees but does not freeze, such as a cellar, basement, or garage.
- Replant in spring according to the above instructions.