Fall Perennials Information
Perennials are a great way to add color, texture, and interest to your gardens! Not threatened by frost and increasing in size over time, these beloved friends of gardeners can be enjoyed year after year in most climates. Most of our perennials are shipped to our customers as "bare root" or "plant starts". This is due to the fact that shipping them in this state puts the least amount of stress on the immature plant. Once you receive your perennial roots or plant starts, it is very important that you do not allow them to dry out. If you are unable to plant them immediately, it is best to keep them in a cool and dark place, such as a cool basement, cellar, or garage.
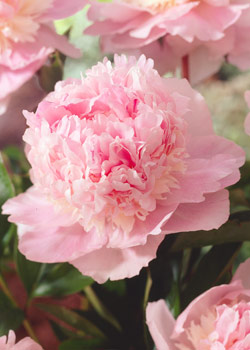
Plant Information
- Planting Time: Fall
- Bloom Time: Summer
- Hardiness Zone: 3-8
- Suitable Zone: 3-10
- Light Needs: Partial Sun/Shade
Planting Fall Planted Perennials
- Select a place in your landscape that receives the recommended amount of sunlight for this particular perennial, keeping in mind the full shade typically refers to receiving less than 2 hours of sunlight per day, half shade means receiving anywhere from 2-5 hours of sunlight per day, and full sun means receiving in excess of 5 hours per day.
- Most perennials will like to be in a location where they receive regular moisture but do not sit wet. Therefore, it may be necessary to amend your soil depending on the current condition.
- *If the area where you are planting tends to retain water (a puddle can still be seen in the area a day after a rainfall), you will need to improve the drainage of that area by amending the soil with organic materials such as peat moss and others that increase drainage. Mix these amendments into the existing soil.
- *If the area where you are planting tends to dry out extremely quickly and not hold much water, you will need to increase the water-holding ability of the soil by adding amendments such as peat humus and compost manure. Mix these amendments into the existing soil.
- *If the area is extremely rocky, has an extremely high clay content, and is full of generally poor soil which lacks nutrients, it may be beneficial to remove the top 12" of soil and replace with a topsoil/peat moss/compost manure mix.
- Once the soil has been properly amended (if necessary), thoroughly cultivate the soil with a rototiller or cultivating fork to break up any large clumps of soil. This will improve the drainage and air circulation of the soil, as well as quicken the planting process. When you are finished, the soil should be quite smooth and extremely easy to dig into using a trowel.
- Now that the soil has been amended and cultivated, you are ready to plant! The key to planting perennial roots or plant starts is to plant them at the proper depth. Planting these perennial roots too deep will cause them to become water-logged and the result is often a rotted plant. If it is not planted deep enough, the roots will dry out and bake in the sun, causing them to die most often before a plant even begins to grow. The best way to achieve this is to envision the plant in its prior year of growth.
- *If there is a shoot beginning to sprout from the roots, you will want to plant the roots at a depth that puts the "crown" or base of this need shoot right at the soil surface.
- *If there is yet no sign of growth but simply the roots, you will essentially be burying the entire "plant" in the ground. However, the very top of the root system (or "crown") should be just below the soil surface so that when the plant emerges, the base will be at the proper depth.
- Space the plants at the recommended spacing to allow for adequate air circulation and room for the plant to reach its mature size.
- Once planted, water the area well with a light mist as close to the ground as possible. Be sure not to over water at this point as may cause the not yet established roots to shift and move from the place in which they were planted. It may be necessary to water for a few minutes and then give the water some time to penetrate the soil before watering again.
- Add a thin layer of mulch at this time (1/2 to 1" thick) to seal in the moisture and warmth. As the temperatures begin to drop over the next several weeks, it may be beneficial to add another inch or two to further protect the plant from the winter weather.
- Depending on the temperatures in your area over the next several weeks or so, your perennial root starts may or may not start to show signs of growth. This is not nearly as important as what is happening under the soil where the roots are establishing themselves for the winter ahead.
- If located in an area which receives a true winter, any growth that may have grown from the root start will begin to turn brown once the weather begins to turn cold. This is the natural progression for the plant and should not be cause for alarm. Discontinue any fertilizing at this point as you do not want to encourage fresh, tender growth just prior to winter.
- Most perennials will benefit from being cut back within 6" of the ground during the fall. This will give your flowerbed a nice "clean" look for the winter and will discourage the collection of leaves at the base (see notes on specific perennials for more information).
- If planted correctly, the plant should begin to emerge in the spring within two weeks once the weather is warm enough (consistently above 65 degrees Fahrenheit, even during the nighttime hours). During this active growth period, it is important to provide approximately 1" of water per week, adjusting this according to how much precipitation is received naturally. A water soluble fertilizer can also be used during this time at an interval of every 10-14 days to increase vigor and blooming. Deadhead blooms as necessary to encourage a second bloom, depending on the type of perennial you have (see notes on specific perennials for more information).